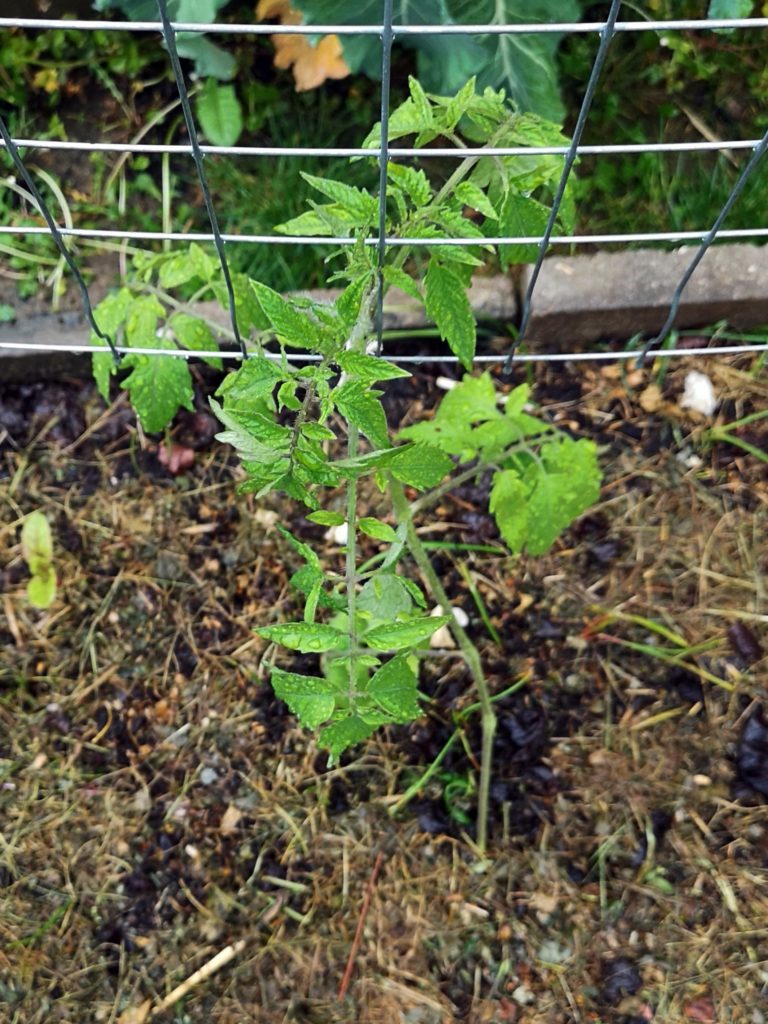
Sometimes seedlings get long and leggy and even start flopping and tumbling over because the stems are so thin. Depending on the growing conditions the seedlings have this is sometimes unavoidable. But there is no need to replace them! If transplanted correctly, even super long and thin tomato seedlings will grow up to be strong and productive tomatoes. We show you how to save leggy seedlings!
Although I do my best to plan seeding time and transplanting time well each year, I almost always get some leggy tomatoes anyway. Because I grow almost everything from seed without using grow lights, it seems inevitable. Sometimes that’s because late frost delays the planting. Or a warm couple of weeks in early spring speed up the growing like crazy. What ever the case: this is no reason to despair!
How to Transplant Tomatoes – General Advice
This is some general advice, that all tomatoes benefit from. Depending on the size of your growing container, you will need to repot your tomatoes before planting them actually out in the garden. This advice should be kept in mind, no matter if the seedling is leggy or not.
When does a tomato need transplanting?
You should earliest transplant your tomato when it has its first set of true leaves. Those are the leaves that look already like real tomato leaves. The first to leaves have an elongated, oval shape and are not the true leaves. That way you make sure that the tomato had time to develop a decent root system.
A clear sing, that te current container is too small, is roots growing out of its bottom. Also yellowing of the leaves or stunted growth is a hint, that a tomato needs to be re-potted. As this shows a lack of nutrients (especially nitrogen) you could avoid the re-potting or delay it a bit by using fertilizer. BUT I would only recommend this for bridging a short period of time like a weeks or so until you plant them out. If possible you should always opt for re-potting a plant as this enables the plant to grow a better, bigger root system. In the long run, this will benefit the plant greatly.
How to transplant a tomato
No matter if you transplant it into the garden bed or another container, the process is always the same: Make sure to NOT water the plant on transplanting day. Wet soil can be heavy and sticky and cause the roots to tear in the transplanting process.
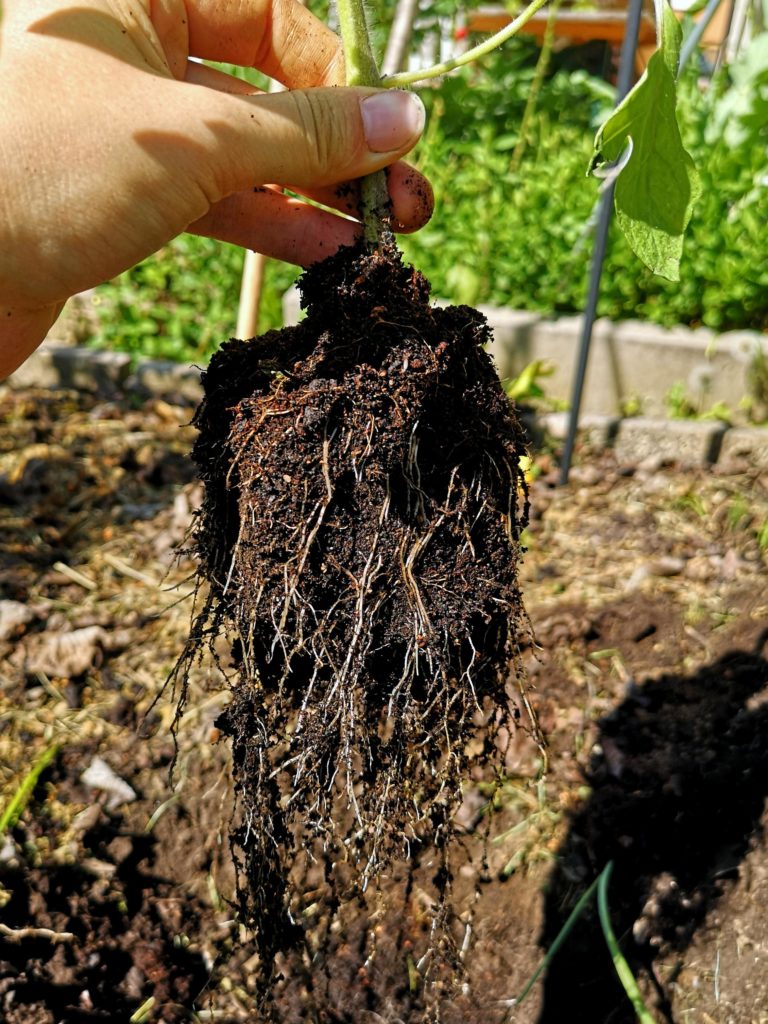
First loosen the soil around the sides of the container. If the container is flexible you can squeeze it a bit from all sides to do so. Otherwise use a thin object like a stick or knife. After that you should be able to slide the root ball right out of the pot. Wiggle the stem a bit (hold on to it at the very base) and pull the plant out slowly and carefully.
I use recycled milk cartons as seed containers which hold up for just one season. So I just tear the containers open all along the side to free the roots and the soil. Milk cartons are also big (deep) enough to avoid repotting while the tomatoes are still inside.
Try for your new container to be a little bit deeper than the current one. Your aim is to have a bit of earth underneath the roots and also to burry the tomato a little bit deeper than it was buried before.
Thereby you allow the plant to build new roots all along the now buried stem. If the roots have formed a compacted, dense mass (“root-bound”) you can loosen them up a little bit with your hands. Remove the seed leaves (the oval ones) if they would otherwise be buried. Now place your tomato in the new container and fill the gaps with soil. Press down slightly and water everything gently.
Remove any lower leaves (partially or whole) that are touching the ground and if possible mulch the ground with straw, hey or grass clipping. Thereby you reduce evaporation from the earth and prevent the spread of late blight.
How to save leggy seedlings
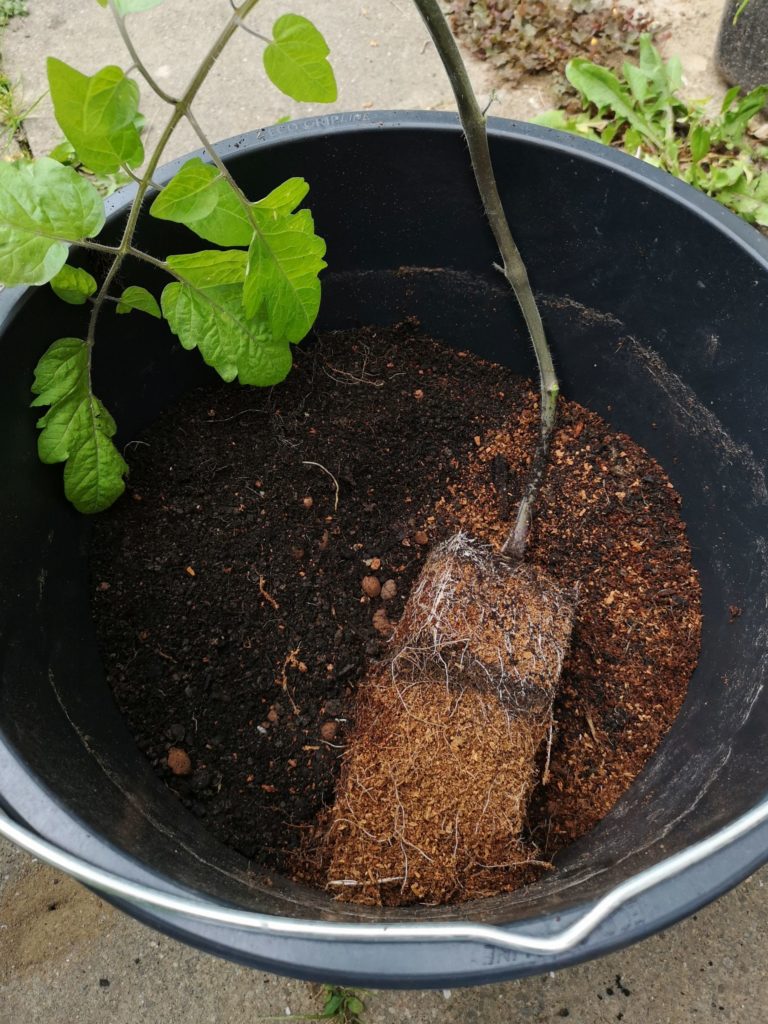
Leggy seedlings are unstable and vulnerable to flop over to the ground or break. Under this conditions the plant will struggle to support fruit and is more susceptible to general damage from insects or disease.
A young tomato plant should be able to stand up straight without support. The stem should be flexible but sturdy and the leaves should grow close to each other. If there are big gaps between the single leaves, exposing a thin and weak stem, then the tomato has grown leggy. Fortunately transplanting is a perfect way to save leggy seedlings!
When transplanting, the stem should be buried that deep, that the part of that plant, which remains above ground, can stand up straight on it’s own.. This sometime requires to burry up to two thirds of the plant underground. To do so, you need to strip the leaves, which would otherwise be buried. Do so very gently to avoid unnecessary damage to the plant as this would prime it for the disease.
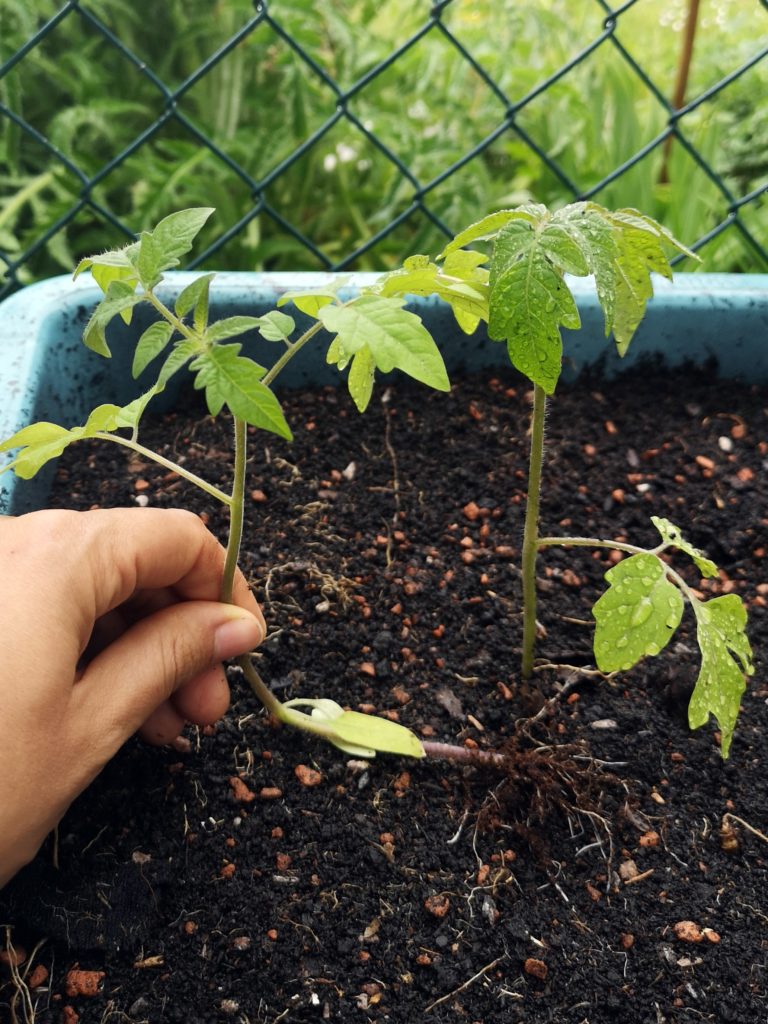
If your new container or planting bed isn’t deep enough to achieve the necessary depth you can bend the plant into shape. The thin stems can normally easily be bent in a 90 degree angle (or which ever angle suits you) to fit the plant in its new surrounding while still bury the stem as required.
The picture shows two leggy seedlings, which where not able to support their own weight before transplanting. They flopped over and leaned against the window, where they where growing. One can be seen already buried to a depth where it can stand up straight on its own again. The other one is bent into position, to demonstrate how the first seedling was buried. The root ball is essentially transplanted laying on its side. This method is in fact useful for all tomatoes – not only leggy ones.
Why most tomatoes benefit from beeing transplanted laying down
Most tomato plants, even if not grown leggy, benefit from this way of burying. Keep in mind though that strong and sturdy plants can not be bent that easily!
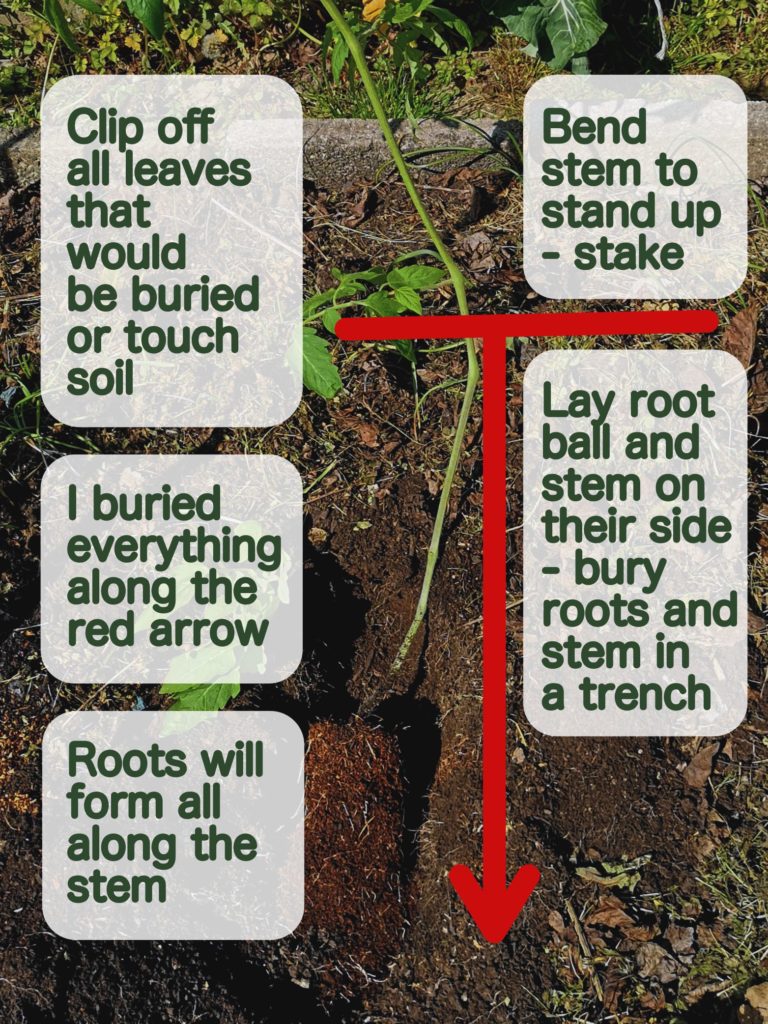
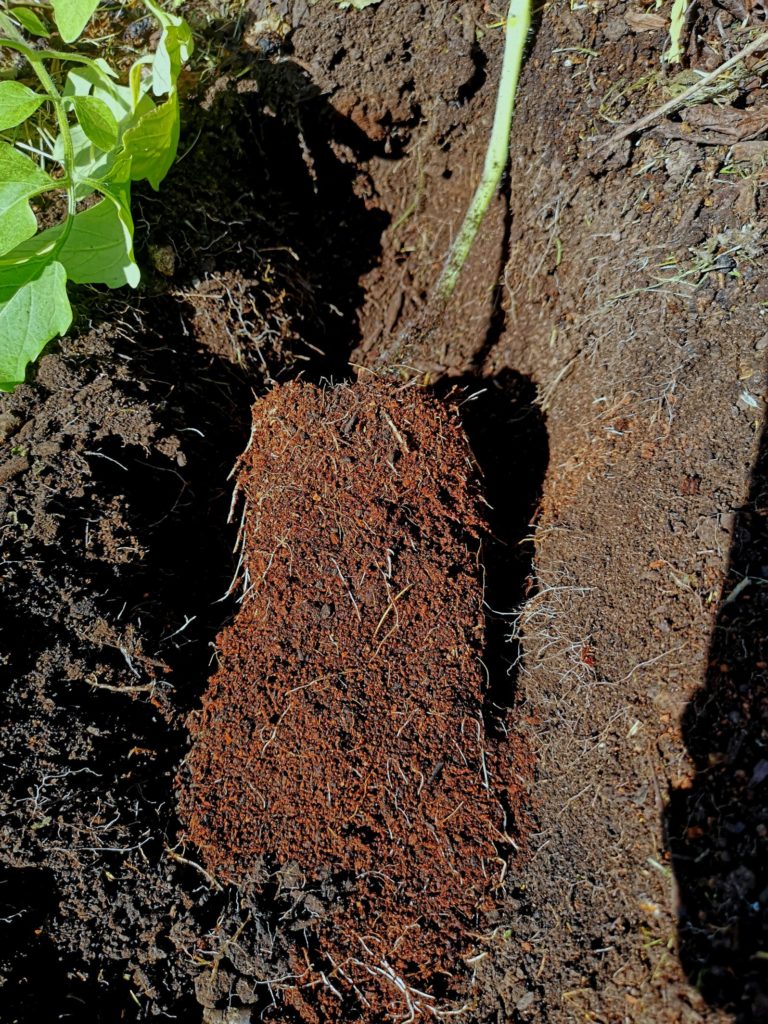
Be very gently and don’t force the stem into any angle where there is too much resistance! Otherwise you risk breaking it. Dig a trench like hole and lay the tomato down. The trench should be shaped that way, that the end of the root-ball is slightly lower then the top. Thereby the plant should poke out off the new planting hole in somewhat of a 45 degree angle.
Burry the roots well and bend the stem slightly up, so the tip of the plant is upright again. You will need to stake the plant, to avoid it touching the ground. Then – as recommended generally – water the plant gently and cover the earth with mulch.
After a couple of days the plant will adjust to it’s new position. It will grow straight upright and the roots will grow down along the complete surface of the root-ball including the buried stem. This normally highly increases the area covered by roots which in turn helps the plants to take up more nutrients and moisture.
Thanks really practical. Will certainly share site with my good friends. Valentia Gilburt Hadwyn
Good post. I am experiencing a few of these issues as well.. Anna-Diane Hillyer Georgia
I have been reading out many of your articles and i must say nice stuff. I will surely bookmark your blog.